Why choose a Mirrix to weave beads?
While Mirrix Looms are more expensive than most other bead looms, they are professional-quality and also much more versatile than other looms. With a Mirrix you have a choice of eight loom sizes, ranging from 5” across to 38” across. You can make large pieces on our larger looms, or even weave multiple thinner pieces side-by-side. Mirrix Looms also have many available accessories including the popular No Warp-Ends Kit (which comes standard with the 5” Mini Mirrix) and the Mirrix Shedding Device, which offers a faster and totally unique way to weave beads.Weaving beads on a loom is much faster than off-loom stitches and the wider your piece, the faster it is. The equivalent off-loom stitch would be square stitch which is the most time-consuming off-loom stitch there is. It’s difficult for beginners to get correct tension when weaving off-loom stitches, but on the loom, the loom automatically provides the right kind of tension so that is never an issue.
What are the exacting requirements of a great bead loom?
1) Provides great and even tension. There should be no compromise on this.
2) Stands sturdily in place either on a table, in your lap or on some kind of stand.
3) Provides the length you need relative to the width you require.
4) Provides different options for warp spacing to accommodate different bead sizes.
5) Guarantees a lifetime of use.
6) Has the option of accessories for different methods of weaving, like a shedding device and No Warp-Ends Kit.
8) Is beautiful, which is why we say “Because the loom you weave on should be a work of art”.
Methods
What is the difference between bead weaving with and without the shedding device?
Without the shedding device you weave beads using the traditional method, sewing beads to the warp. With the shedding device you lift warp threads and place beads (on a thread between those warps). Then, you change the position of the shedding device and the warp threads move and secure in the beads.
No Warp-Ends Weaving
No warp-ends weaving is a way of weaving beads that eliminates the need to weave-in warp ends when finishing a bead woven piece. This can be accomplished on any Mirrix Loom with the addition of a No Warp-Ends Kit (note: The Mini Mirrix comes standard with this kit). Set up with the No Warp-Ends Kit is very easy and once you have it in place, you can weave as many pieces as you want (as long as they are the same size) using the same setup. Click here to learn more and purchase this kit.
Supplies
What types of beading thread should be used?
Any beading thread you have that is strong will work. Right now we've been using One G by Toho.
Types of Beads
There are so many beads to choose from because you can weave any kind or size of bead on the Mirrix loom. The variety of warp coils accommodates this large selection of possible beads that can be woven on a Mirrix. Even some of the new bead shapes like the Tilas can be woven on a Mirrix. You can also mix bead sizes and shapes. We find that when the beads we want to use are slightly different sizes it is best to alternate them both in a row and then again in the following row. It is like putting together a puzzle. One of our Affinity bracelets uses Tila beads and size 8/0 seed beads. The Tila beads take up twice the width of the seed beads, so we set the warp twice as far apart where the Tilas will be placed. We wove a row of six size 8/0 seed beads to begin, but the middle two seed beads did not have a warp between them so that for the next row we could weave two seed beads, one Tila bead, two seed beads. The next row was two seed beads, then you sew through the second Tila hole and then two more seed beads.
This just illustrates the fact that you can allow your beads to determine how your piece will be woven. There is a lot of room for experimentation. I think the habit with bead loom weaving in the past was to rigidly stick to one size and one kind of bead using a variety of colors and finishes to create the pattern. We like that too.
Speaking of Delicas, they and the equivalent Toho Treasure were designed for bead loom weaving. They provide a much more fluid surface than round seed beads and play with light differently because they are curved in only one direction (because they are cylinder shaped) and not rounded like regular seed beads which reflect light in a bunch of directions. The cylinder beads retain a sharper sense of color and shine and evenness. But that is not always your desired result. Sometimes the round seed beads are the right choice.
Most of the glass beads we use for bead loom weaving (and they tend to have a catchall name of seed bead even when they are not round) come from either Japan or the Czech Republic. The Japanese beads tend to be relatively more consistent in shape and size and one has to cull fewer. They are also more expensive with the Cylinders commanding the top price although this is also relative since their larger holes make them weigh less and hence you get more of them per gram. Czech beads tend to come in strands and hanks. The fact that they are not as regular can become a design element or a distraction depending on your perspective.
Besides the vast possibilities provided by glass beads, there are also crystals and stones that can be used in bead weaving. We like to combine crystals with our glass beads for certain projects. The same can be done with stones. Therefore, bead weaving on a loom is not much different from off-loom beadwork in that you can use and combine a huge selection of bead-like materials. And the Mirrix, because of its fabulous tension and overall fabulous design, provides the perfect work surface for these wonderful little points of light and color.
Our advice to you is: try every bead shape and size you can get your hands on. Mix them up. The great thing about bead weaving failures is you only waste a little thread. The beads can be ripped out and reused forever. Your time is never wasted because in that failure lives a huge lesson.
Beading Needles
A strong beading needle like a Tulip Bead Weaving Needle is perfect for weaving beads on a loom.
Warping
How do you know what warp coil to use?
Place the beads you plan on weaving on a needle and measure an inch. Then, count how many beads are in that inch. The number of beads minus one is the warp coil that will be used. There is some leeway in this, and depending on the beads you are using, it might not work out perfectly (numerically), just close. Using a smaller (lower number) coil is better than using a larger (higher number) coil.
This chart shows which warp coil to use for some common bead sizes:
Delicas:
8/0- 9 per inch: Use the 8 dent spring
10/0- 14 per inch: Use the 12 dent spring
11/0- 19 per inch: Use the 18 dent spring except when doing very wide pieces, when you should use the 16 dent spring.
15/0- 25 per inch: Use the 22 dent coil just in order to space the beads.
Seed Beads:
15/0- 24 per inch: Use the 22 dent spring.
11/0- 14 to 15 per inch (sizes vary slightly depending on finish and manufacturer): Use the 14 dent spring.
8/0- 12 per inch: Use the 10 or 12 dent spring depending on what size warp you are using. For example, when using the bead cord, because it is thicker, you will use the 10 dent spring. But if you are just weaving straight beads using beading thread as warp, you will use the 12 dent spring.
6/0- 8 per inch: Use the 12 dent spring warped every-other-dent for 6 dents per inch.
Warping for bead weaving without the shedding device
See our online .pdf warping instructions here. See our bead weaving warping video here.
Warping for bead weaving with the shedding device
See our online .pdf warping instructions here. See our bead weaving warping video here.
Warping for bead weaving with the shedding device is slightly different from other types of warping, simply because two warp threads go in each dent (space in the warp coil) instead of just one. Then, when you put on the heddles to attach to the shedding device, instead of putting heddles on every other warp thread, you put heddles on one warp thread from each dent.
Why do we warp two warp threads in each dent when warping for beadwork with the shedding device?
When weaving beads with the shedding device you sandwich the beads between two warp threads instead of sewing them in behind the warp like you do when you weave beads in the traditional method. When you are in one shed, you lift one warp thread in a dent and when you switch sheds you lift the other. This also makes your bead weaving stronger because you have twice as many warp threads!
Changing your shed
Every time after you weave in a row change the shedding device automatically so you know that you’ve done that. If you can’t remember if you changed your shed go to your last row of woven beads and see if they push up easily. If they do you haven’t changed the shed; if they don’t than you have changed your shed. Every time you change the shed, strum the back of the warp to release any warps that are stuck. Visually assess your warps to make sure the correct ones are raised before you weave through each row.
Checking those heddles
When weaving beads using the shedding device: When you look at the shedding device in the neutral position and look at the heddles, make sure they are not overlapping. Remember to sew in your first row of beads because the shedding device will not work without that base. You must also sew in the last row. Your piece will fall apart if you do not do this.
Weaving
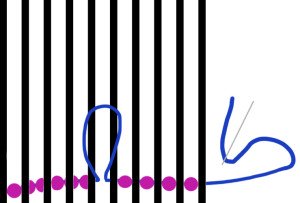
How do you keep a straight line when doing your first row of weaving with seed beads?
Run your finger along bottom of first row until it is straight. If you are using the bottom spring kit, weave the first row directly above it. The beads will rest against the tray and will necessarily be straight.
Weaving a wide piece (without the shedding device)
If you’re weaving a wide piece, you don’t have to weave the whole row at once, you can weave it in sections. String your beads, bring your thread with the beads behind the piece and then begin sewing through the beads in sections. To make each section, simply make a loop with your weft at the end of the first section (you can make this section whatever size you are comfortable with) and pull that loop to the front of the weaving. Hold on to that loop, pulling the thread taut and making sure your beads are correctly behind the warp threads. Then, sew through your beads on the top of the warp threads. Once you’ve finished this section, it will stay in place and you can move on to the next section.
How to find the correct tension:
You want enough tension that you get a clean shed and have a taught warp. Your warp should be tight enough that your beads stay securely in once you place them between the warp threads.
Which side do I start weaving from?
If you are right-handed, sew through from the right side. If you are left handed, sew through from the left side. Mirrix Looms were designed for both right and left-handed people.
How to finish and start a weft thread:
When your weft thread (the thread that holds the beads) gets too short, partially sew it through the row of beads below, wrap it around a warp thread to tie a knot then continue sewing through the row of beads. Do this until you feel the thread is completely secure. You begin a weft thread in exactly the same way, starting a couple of rows of beads down with the goal of getting the thread to the left of the piece if you’re right-handed and to the right of the piece if you’re left-handed. Click here for a tutorial.
Accessories
The No Warp-Ends Kit
We’re always looking for ways to make weaving easier, and we found a great way to avoid having to finish those pesky ends when weaving beads! The No Warp-Ends Kit, as we discuss above, is easy to use and is perfect for beginners and experts alike. Try weaving wire with this kit, too.
Watch a video about this kit here
The Bottom Spring Kit:
The Bottom Spring Kit is an add-on accessory that attaches to the bottom beam of your loom. This warp coil helps organize your warps at the bottom of the loom, just as your warps are organized at the top. It is great for wide bead weavings as well as small scale tapestry. If you are using the bottom spring kit, warping is exactly the same except you place your warps in the bottom spring exactly how you do so on the top springs.
The Add-On Bottom Beam:
Clip this add-on beam to the back of the bottom beam of your loom with the included C-Clamps and you increase the distance between the front and back warps by an inch and a half, providing a total of two and a half inches of space between the two layers of warp. This is perfect for those who weave wide bead pieces using the traditional method because you can easily get your hand behind the warp to hold the beads in place. It also works for tapestry weavers who want more space between the front and back warps.
Loom Extenders
Loom Extenders are ideal for people who want to weave belts, guitar straps and longer, thin pieces without having to purchase one of the large looms. Included are two lengths of threaded rod, a coupling device to attach it to the threaded rod sidebars of the loom, and feet extenders to give your loom its original stability.
Finishing
The following is a list of a few different ways to finish a bead weaving that has been woven on a Mirrix Loom:
Weaving a header and a footer
This method can be used whether or not you use the shedding device. Once you’ve finished weaving your piece and before you cut it off the loom, weave a header and footer using a needle and warp thread. Simply weave under and over the threads, going back and forth until you’ve created about a third of any inch of fiber weaving.
Once you’ve woven your header and footer, remove your piece from the loom and tie overhand knots with pairs of warp threads. Weight your piece and stick a needle in the overhand knot to guide the knot as close to the body of bead woven piece as possible. Once you’ve tied off all the warps, trim them to about half an inch. Fold the header and footer to the back of the piece and sew them so they remain there. You will either have to back your piece with something like ultra-suede or attach it to a cuff or, if this is a beaded tapestry, attach it to some kind of backing.
Sewing in your ends
This method is rather difficult. Although with a thin piece and patience, it can be accomplished. Seed Bead Bliss has a tutorial here.
The Selvage Method:
The Spruce Crafts has a tutorial here.
No Warp-Ends method
If you use our No Warp-Ends Kit you will have no warps to weave in when finished. For pieces woven NOT using the shedding device this is a great option.
Next Steps
GET HELP CHOOSING A LOOM FROM ONE OF OUR EXPERTS HERE.