Beginning to Weave
We will begin our piece with a row of soumak knotting with a length of the hemp warp. With soumak you will wrap around the front of two warp threads, then go back behind the second one and then wrap around two more, go back behind the second one, wrap around two more, etc. Tie knots on either side of your row of soumak.


Weaving geometric designs can be a challenge because you need to make sure your piece is even on both sides. We will keep track of this by keeping track of how many times we wrap around warp threads, bringing our weft from going in one direction to the other. For this entire piece we will count TWO wraps on the left and right before either decreasing (in the case of weaving a triangle) or increasing (in the case of filling in the outside of a triangle).
See the diagram below:

Let's get started!
Put your weft onto your tapestry needle.
Begin weaving from the right to the left side of the piece, weaving over and under, and making a pigtail (see description above) at the end (on the right side). This pigtail will count as one wrap.

When you get to the left edge, go back in the other direction (left to right) to the right edge.

Now, go back from right to left and then again from left to right. This time, stop at the second-to-last warp thread. Then, go back in the other direction (right to left) all the way to the second-to-last warp thread on the left side. Now, head back from left to right, again to the second-to-last warp thread on thee right side. Continue this pattern, decreasing by one warp thread after you’ve wrapped your weft thread around any given warp thread twice.


Keep doing this until you have reached the tip of the triangle. Wrap your weft around the middle warp thread at the tip of the triangle twice.

For more on the concept of decreasing, check out the video below.
Now, you will begin to fill in on the sides to complete the first chevron shape.
This is a good time to introduce the concept of weaving in opposite directions. Weaving in opposite directions (or, meet and separate) is a very important tapestry concept that allows you to weave multiple wefts next to each other and over each other in a piece. By making sure each weft is heading in the opposite direction of the weft next to it, you ensure that your wefts are facing in the right direction when you overlap them.
Look at the two pictures below. The first shows the blue weft put into your piece going from right to left, the same direction as the weft on the same plane as the weft in the triangle. You can see how this becomes an issue as you weave up. The second picture shows the blue weft going from left to right, the opposite direction as the weft on the same plane you already wove in the triangle. This is correct.


Begin to fill in the left side of your triangle with a new color, beginning going from left to right (remember to make a pig-tail so the end of your weft is facing the back of your weaving) and increasing to the right every two wraps as you fill in the triangle.
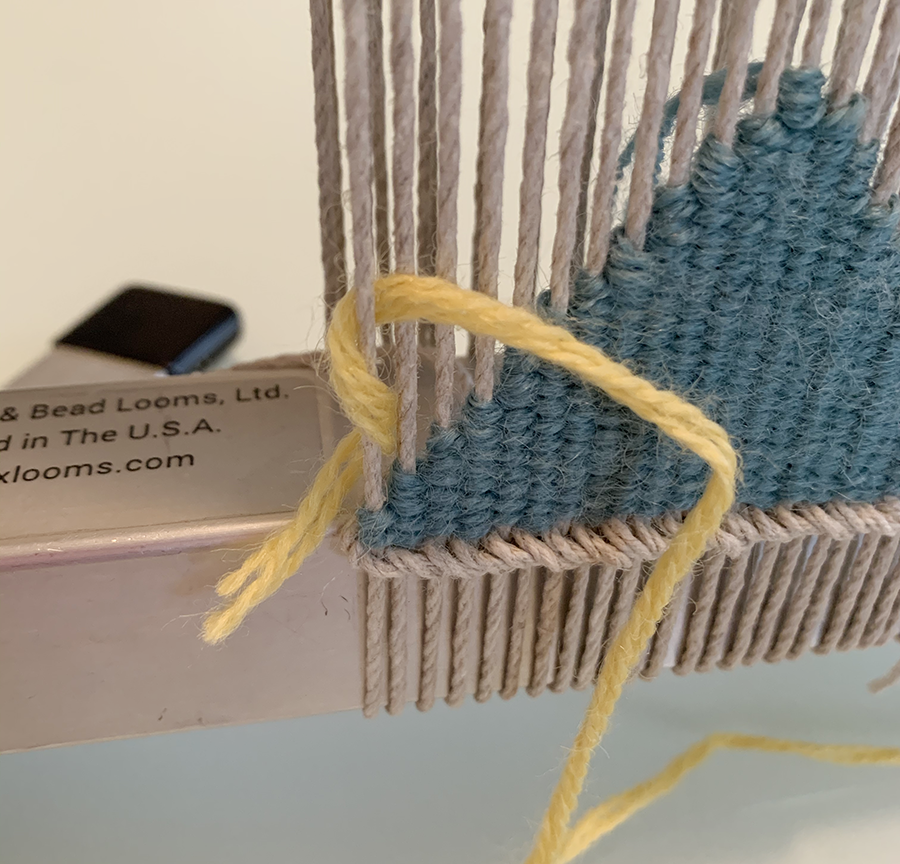


You will do the same thing on the opposite side, beginning your weft going right to left.


When you’ve reached the top of the triangle, weave a half pass all the way across the top of the triangle. This will be the first half-pass of your next triangle.


If everything went well, you should be able to bring your weft all the way across the top of the triangle and everything will be in the correct shed. If you've made a mistake, this may not be the case. Don't worry! If the shed is wrong on the other half of the triangle (where you wove up before) weave your last half-pass only halfway across and end the thread there. Then, start a new weft going from right to left and weave all the way across.
Now, weave another triangle just as you wove the first one. This will be the same color as you used to fill in the sides of your first triangle, making your first chevron shape.


When you’ve finished weaving up your second triangle, fill in the sides with a new color.

Remember, if you run out of weft, it's easy to end one and begin a new one! Tuck your old weft behind the warp and then tuck a new one behind the warp in the same place and continue weaving with that one!

Then, as you did before, weave another triangle using this same color.


When you’ve finished this third triangle, choose a new color to fill in the sides.

Weave four passes (eight half-passes) over the top of this triangle.


You're done weaving!